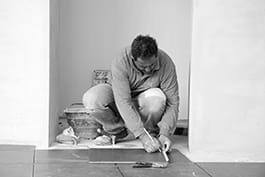
Profession tile fitter

Tile setters, tile layers prepare, conduct and finish tiling work on walls, floors etc.
Would you like to know what kind of career and professions suit you best? Take our free Holland code career test and find out.
Personality Type
Tasks tile fitter
- Organize the materials and the work area, e.g. gather and check required tools and materials.
- Check and prepare the surface, e.g. by cleaning, smoothing and applying adhesives.
- Set out tile distribution, and measure and mark the surface to be tiled.
- Mix mortar, glue or other substances to the right consistency taking into account e.g. tile weight and thickness.
- Make tiles the right size, e.g. using (electric) cutting tools.
- Prepare surfaces, e.g. apply mortar on floors and strickle off smoothly.
- Set or lay tiles straight and evenly on the surface with mortar or glue, and press or tap the tile.
- Finish off the tiling work, e.g. finish and dress the joints and clean the work area.
- Carry out specialized tiling work (e.g. stairs, mosaic, patterns).
- Conduct repair and renovation work on tiling.
Related professions flooring
- Carpet, linoleum or cork floor layer
- Parquetry worker
- Terrazzo worker
Knowledge
- Sanding techniques
The various sanding techniques (such as gang sanding), as well as the different sanding papers necessary for which surface.
- Types of tile adhesive
Different adhesive materials for different types of tile, surfaces, drying times, environmental conditions and costs.
Skills
- Mix construction grouts
Mix construction materials with water and other materials based on the appropriate recipe. Mix thoroughly to prevent lumps. Avoid contamination, which will adversely affect the properties of the mixture.
- Apply tile adhesive
Apply the tile adhesive, often thinset, to the surface. Load the notch trowel with adhesive and paste it to the wall to form a thin, even layer. Take the drying time of the material and your working speed into account to make sure the adhesive does not dry out. Remove excess adhesive. Apply silicone or mastic along the edges, anywhere slight movement is expected, or for improved moisture resistance.
- Snap chalk line
Stretch a line covered in fine, non-staining chalk between two points and snap it against a surface to produce a straight line.
- Transport construction supplies
Bring construction materials, tools and equipment to the construction site and store them properly taking various aspects into account such as the workers' safety and protection from deterioration.
- Work ergonomically
Apply ergonomy principles in the organisation of the workplace while manually handling equipment and materials.
- Use safety equipment in construction
Use elements of protective clothing such as steel-tipped shoes, and gear such as protective goggles, in order to minimise risk of accidents in construction and to mitigate any injury if an accident does occur.
- Lay tiles
Firmly place the tiles on a surface prepared with adhesive. Adjust their position to so they are flush and evenly spaced. Take care not to disturb the surface. Insert spacers in the joints. When working vertically with heavy tiles, place a supporting piece of timber to prevent slippage if called for. Remove any excess adhesive from the face of the tile.
- Types of tile
Tiles of different sizes, materials and glazing. Their properties such as weight, propensity to chipping or breaking, moisture resistance, adhesion and cost.
- Follow health and safety procedures in construction
Apply the relevant health and safety procedures in construction in order to prevent accidents, pollution and other risks.
- Use measurement instruments
Use different measurement instruments depending on the property to be measured. Utilise various instruments to measure length, area, volume, speed, energy, force, and others.
- Caulk expansion joints
Fill the space intentionally created to allow for expansion or contraction of the construction materials with a sealant such as silicone.
- Cut tiles
Cut tiles to the right size and shape using a wet tile saw. Set up the wet saw and attach it to a water source if called for. Mark the desired shape and size on the tile. Push the tile against the rotating carbide blade of the saw to make a straight cut. For curved cuts, make straight incisions at right angles along the desired curve. Snap off the resulting 'fingers' and finish the curve with a diamond file.
- Fill tile joints
Use grout, silicone paste, mastic or other appropriate material to fill the joints between tiles. Spread the mixture onto the tiles using a padded trowel or float. Make sure the mixture is worked into the joints before removing excess material. Use a diagonal motion to avoid scooping material from the joints. Wash material from the front of the tiles and buff the tiles to finish.
- Plan tiling
Plan the position of the tiling on the surface. Mark straight and flush lines to determine the position of the tiles. Decide on the spacing between the tiles. If tiles have to be cut to size, avoid small slivers as they may be hard or nearly impossible to cut, depending on type of tile and equipment used.
- Inspect construction supplies
Check construction supplies for damage, moisture, loss or other problems before using the material.
Optional knowledge and skills
aesthetics plan surface slope keep records of work progress make mosaic keep personal administration process incoming construction supplies attach accessories to tile maintain work area cleanliness interpret 2d plans calculate needs for construction supplies maintain tile flooring answer requests for quotation art history order construction supplies estimate restoration costs apply restoration techniques monitor stock level install insulation material advise on construction materials drill holes in tile protect surfaces during construction work operate mosaic tools interpret 3d plans work in a construction teamSource: Sisyphus ODB